Installation and Quick Start
To install Folderize, click “Get It Now” on its AppExchange page. In Enterprise Edition and higher, select “Grant access to admins only” in the install dialog.
(If you grant access to “all users”, this grants all permissions to all users, which results in the Folderize permission sets having no effect; a permission set can only extend privileges, not restrict them. If you already installed for all users, see the “Initial Considerations” section of the App Permissions page.)
The install process may take a minute or two, during which it may appear nothing is happening. You will receive an email message when it is complete. If you are new to the process of installing apps, you may want to review this Salesforce knowledge article: Install a Package.
Make Attachments Available to Folderize (Classic)
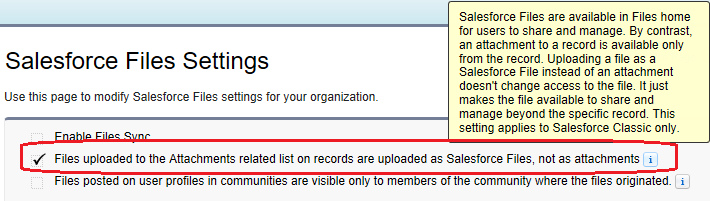
In Classic, to make attachments (such as to an Account or Opportunity record) available to put in Folderize folders, you must enable the following setting.
In Salesforce Setup, search to Files then select General Settings. Enable:
“Files uploaded to the Attachments related list on records are uploaded as Salesforce Files, not as attachments”
This will apply only to attachments uploaded after the setting is enabled.
Make Files Available to Libraries
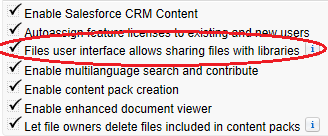
You may or may not want to use Salesforce Libraries together with Folderize. For some considerations about this, see Document Permissions. To do so, you must enable the following setting.
In Salesforce Setup, search to Files then select Salesforce CRM Content. Enable:
“Files user interface allows sharing files with libraries”
Other First Steps
Permissions: Folderize administrators needs permission set SMF Full Access (Enterprise Edition and higher). Users also need an appropriate permission set. See App Permissions for all the options.
Salesforce Classic: After installing, users will find Folderize on the All Tabs page (tab labeled “+“). Click Customize My Tabs to add Folderize to your displayed tabs. (Or the administrator may add this tab to an existing app.) Now click the Folderize tab.
Lightning Experience: On the App Launcher, users will find Folderize LEX under “All Items”. Or use Setup | App Manager to create a new app for it. Also see the Folderize Lightning Components page.
Upload testing: On the Folderize page, click the default folder. Drag documents from your desktop to the document pane, or use Menu | Manage Documents | Upload New. For more details see Managing Documents.
Add folders: As desired, use Menu | Manage Folders to add folders/subfolders or rename the default folder. You also can move folders by dragging them. For more details see Managing Folders.
Share documents: If you have not yet implemented sharing settings, the files you upload to the main page will be private. See Document Permissions to review document sharing options.
Review admin tools: See Menu | Admin Tools for other app options.