Lightning Components
Folderize is in transition from a user interface built on Salesforce’s Visualforce technology to one built on Lightning Experience (LEX) components. Screen shots in this guide may show one or the other, or both.
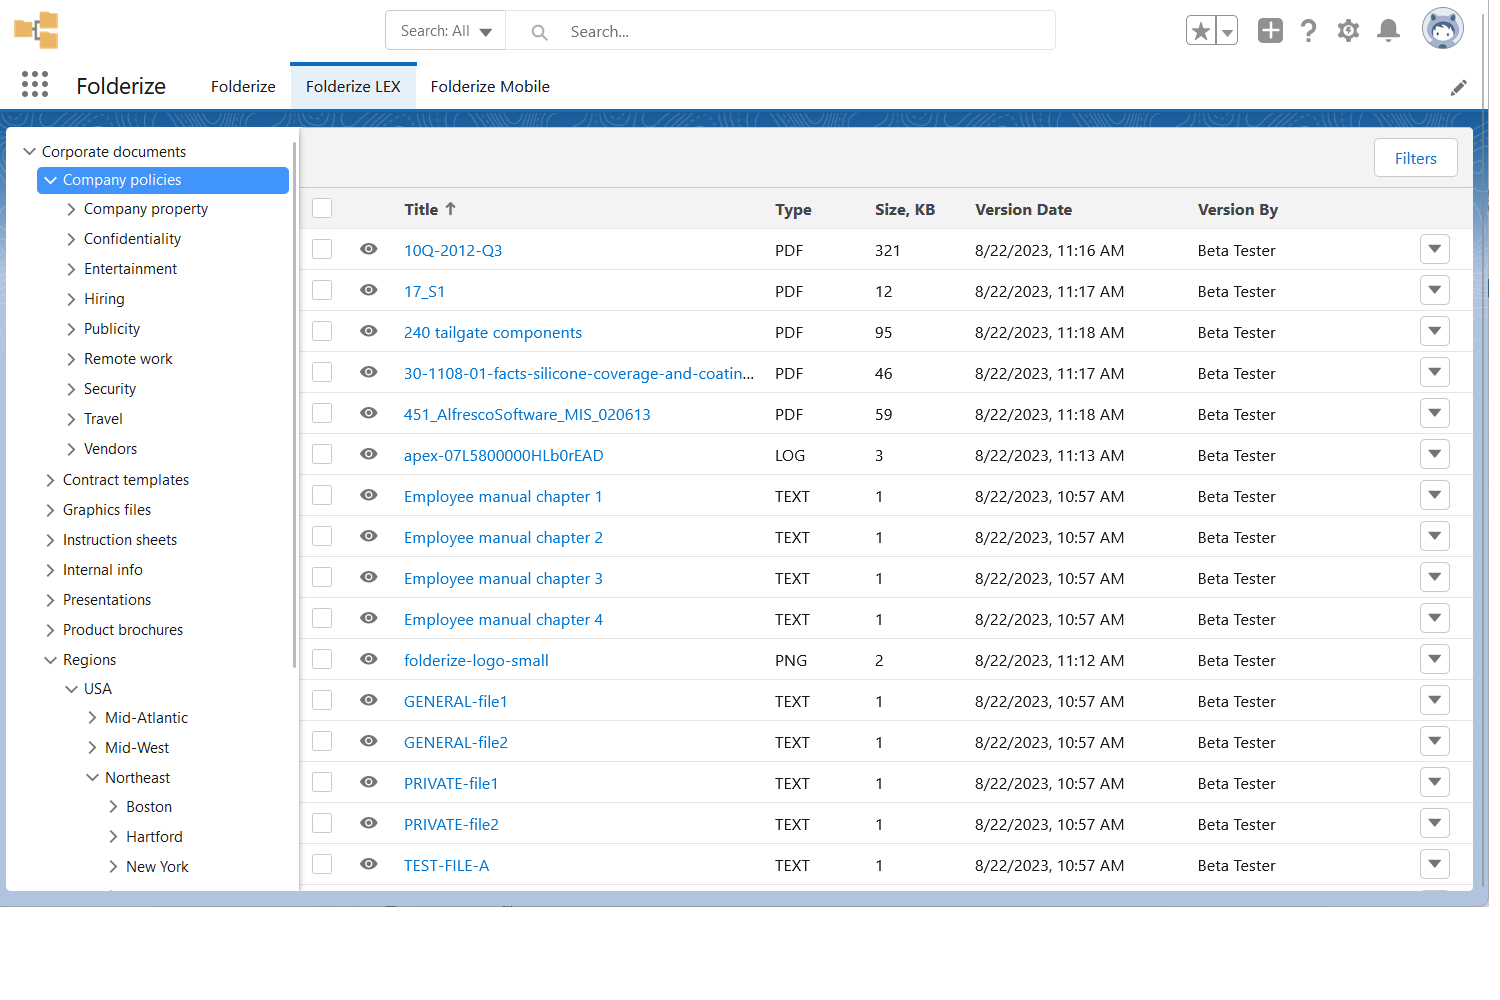
As of version 5.4, the LEX UI (screenshot below) included in the app package, provides most user functionality including document uploading. But for folder management/admin and some other features, it will open the VF interface in a separate LEX tab.
In version 5.3 or earlier, the LEX UI is a “read-only” or download environment. To upload documents or manage folders, a menu within the LEX UI will open the old Visualforce page. After making the needed changes, a user may close that and refresh the LEX view to see the results.
You may deploy the new LEX component in “full” mode (showing all an organization’s files) or object-record mode.
LEX Components in the Package
Two items in the package are related to the new LEX UI:
1. Lightning Web Component. Name: smfl_folderize. Label: “Folderize”.
This is the main standalone component of our new UI. It can be used to create a new Lightning tab or page. Also you can find it in the Lightning Experience and Digital Experience Builders, and then use drag-and-drop to place it on your custom page or a record page.
2. Lightning Component Tab: Folderize LEX.
This is just a ready-to-use Lightning tab with the smfl_folderize component in it.
Lightning Builders: How to Put Component On a Page
This section is common for both Builders: Lightning Experience and Digital Experience (Communities).
- In Setup, open the builder using either of these two ways:
- If you already have a Lightning app, go to App Manager in Setup, find your app and click Edit.
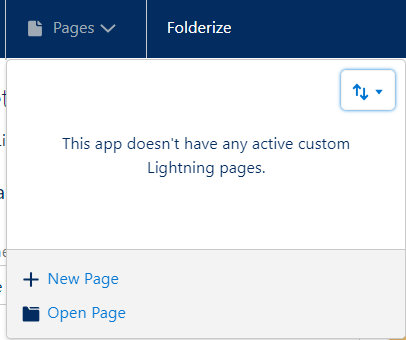
- To create a new page, click Pages in the top menu and select New Page.
- Or select an existing page by clicking Open Page.
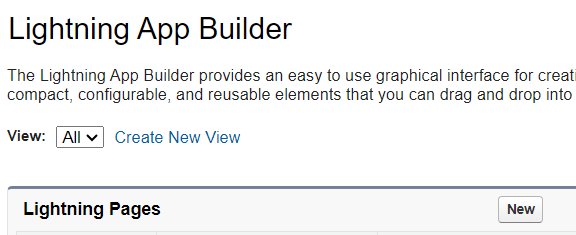
- If you want to create a new page without the app, go to Lightning App Builder in Setup and click New.
2. If you create a new page:
- Select a page type: app page, home page or record page.
- Give your page a name.
- If this is a “Record” page, select an object.
- Select appropriate page layout.
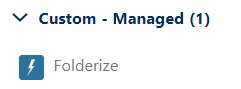
3. Find the Folderize component in the left panel under the “Custom-Managed” group. Place it on your page using drag-and-drop.
- The component recognizes the context automatically.
- If this is an “app” page, then Folderize will work in the Full Mode;
- If this is a “record” page, then Folderize will work in the Object-Record Mode for the current opened record.
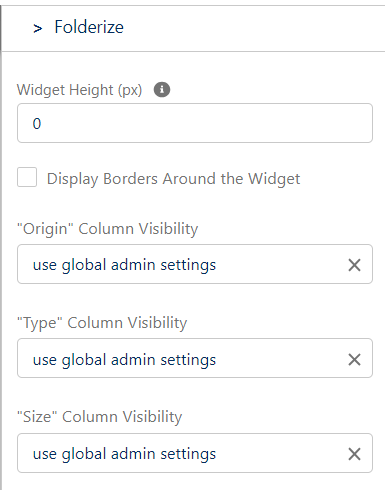
4. Change component behavior using the attributes in the right panel (see details in the accompanying table).
| Attribute | Description |
| Record Id (only for Digital Experience Builder) | Never change this attribute. We declare it because of a Salesforce issue with backward compatibility with the Community Builder. Our component sets the default value in this attribute and this is enough in 99.99% of cases. |
| Widget Height (px) | If you want to set a fixed height to the component, enter the height in pixels. If 0 or blank value is used, then the component does not add own scroll bar and uses the scroll bar of the page. |
| Display Borders Around the Widget | This is helpful if there is no clear visible border between a container and the component. Check the checkbox and the component will draw a border around itself. |
| “X” Column Visibility (where X is a column name) | Several columns in the table with documents support this setting. A setting has three possible values: 1. Use global admin settings: In this case the page uses the global setting for columns visibility that is configured on the “Folderize Admin” page. 2. Show: Ignore the global setting and force show the column. 3. Hide: Ignore the global setting and force hide the column. This setting is useful when you want to place the component in a narrow block. In this case you may decide to hide some columns in this place, but still show them in all others (if they are visible according to the global setting). |
5. If you created a new page, you need to activate it, that is, assign it to org, apps, record types or user profiles.
To do this:
- Click the Activation… button in the top right corner
- This popup will appear:
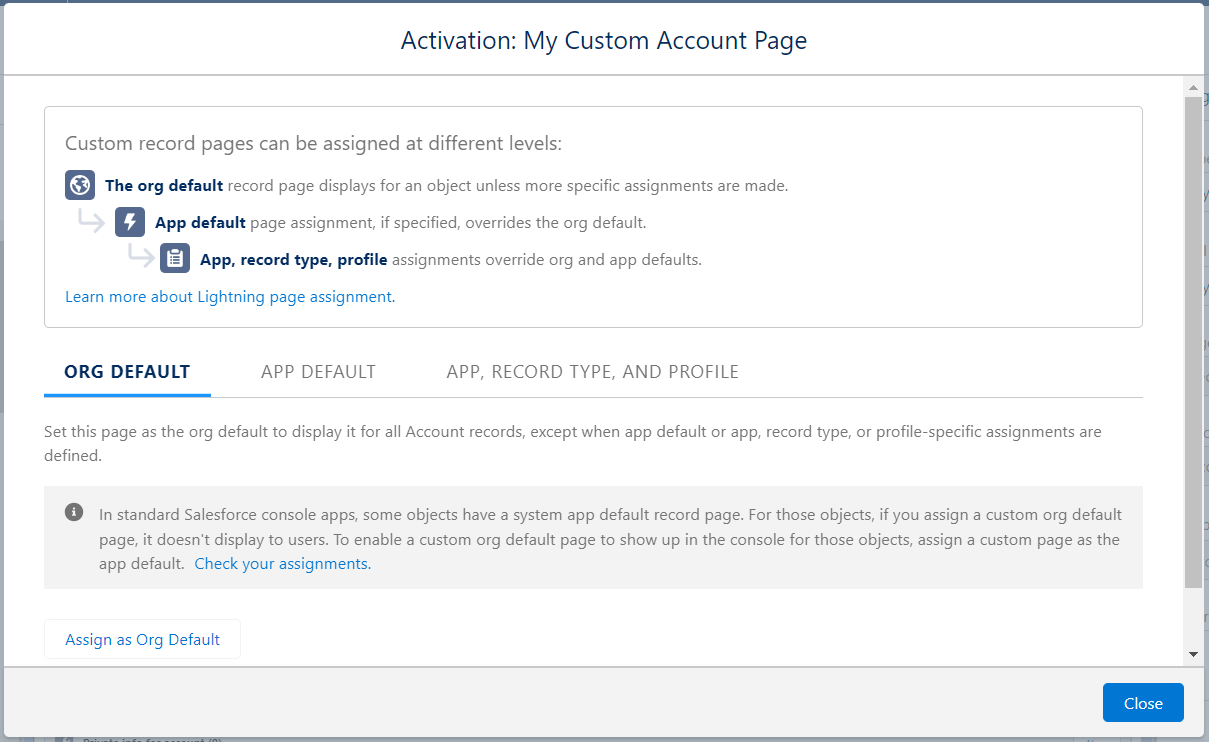
- Select one of the tabs with scenarios:
- “Org Default”: if you want to display this page for an object everywhere:
- Click Assign as Org Default
- Select form factor (desktop or mobile)
- Click Next
- Click Save
- “App Default”: if you want to display this page for an object only in one or several apps:
- Click Assign as App Default
- Select one or more apps
- Click Next
- Select form factors
- Click Save
- “App, Record Type and Profile”: if you want to use this page only in particular apps and for particular record types and profiles:
- Click Assign to Apps, Record Types, and Profiles
- Select one or more apps
- Click Next
- Select form factors
- Select Record Types
- Click Next
- Select User Profiles
- Click Next
- Click Save
- “Org Default”: if you want to display this page for an object everywhere: