Add Folderize To a Layout
This describes how to add a Folderize component to object layouts such as account or opportunity. To show the right documents in these views, you also must configure object-record mode.
These instructions assume you will use the Salesforce page layout editor. If instead your organization created pages using Lightning App Builder, see Using Lightning App Builder.
There are three main sections below:
- Add Folderize directly on an object layout (in iframe or Lightning component).
- Add a button or link which opens Folderize in a separate page.
- Add a button for opening Folderize mobile view.
You may want all of these. Potentially, method (1) can be crowded if there are lots of folders or columns (this also depends on user’s screen size); if so, method (2) gives a user the option to open a wider and taller view.
Depending on your org edition, Salesforce may not allow you to make these changes directly in your production org. Instead, create the new functionality in a sandbox and test; then deploy using Outbound Change Sets or IDE.
Add To Object Layout
In this section we create a simple Visualforce page, which you use as a component in an object layout. These instructions apply to both the Classic and Lightning user interfaces.
1. Start either at:
Setup | Custom Code | Visualforce Pages | New
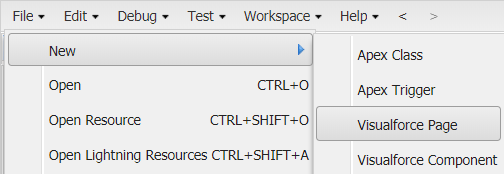
or in Developer Console:
File | New | Visualforce Page
Give your page a name, for example “FolderizeForAccount”.
If the options above are not available, an administrator needs to enable the system setting Customize Application for you. Also you may need to go to Settings | My Personal Information | Advanced User Detail then enable Development Mode, Show View State in Development Mode.
2. Delete the Visualforce markup default code which begins <apex:page> and copy in this block instead.
<apex:page standardController="Account">
    <apex:iframe src="{!URLFOR($Page.sharem__Folderize, null, [linkedRecordId=Account.Id,
     isdtp='vw', isInIframe=true, initDelayInMs=300])}" height="500px">
  </apex:iframe>
</apex:page>
3. Make these changes in the code you have copied, then save.
- Replace both occurrences of “Account” with API name of your object, for example Opportunity. Note that some standard objects have a non-intuitive API name — for example, the Product object API name is Product2. In Lightning see Setup | Object Manager for the correct API name. Custom objects will have a format of MyCustomObject__c (with double underscore).
- If desired, replace 500 with the number of pixels high you want your component to be.
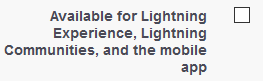
4. A checkbox Available for Lightning Experience…. should be NOT selected in most cases, even if you are using Lightning. (The checkbox appears in Setup but not Developer Console.) The page still will be internally available for use in Lightning; un-checking it will prevent the full page from showing up in mobile view. (Instead, create a mobile-view button as explained below). But for use in a Community/Experience, do check this box.
For a standard or custom layout (Lightning or Classic), continue to next step. If you are configuring a Lightning component, skip to steps 8-9.
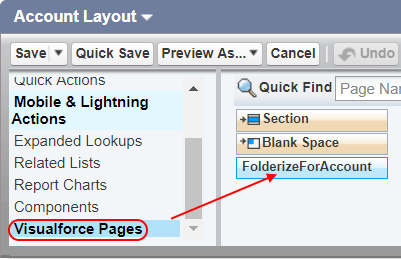
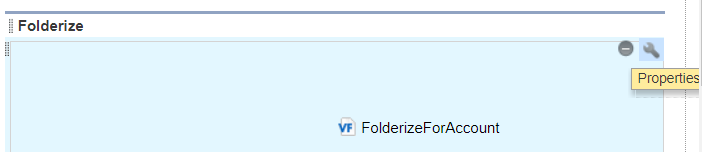
5. Open the layout of your object for editing. Find “Visualforce pages” in the list of available component groups. Find the name of the page you created.
6. We suggest you insert a new section (1-column) for the new component. Then drag and drop your new Visualforce page into the new section, or else wherever desired on the layout.
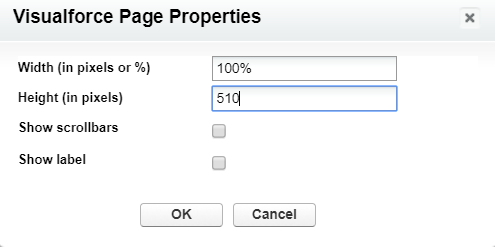
7. Click the wrench icon in the upper right corner of the component you just placed on the layout, and set its height to the value you used in step (3), plus 10 pixels. For example, 500 + 10 = 510. Click OK.
We recommend 100% width and no scrollbars. Folderize looks best at full width, and adds its own scroll bar if needed. Save your layout changes.
8. Notes about frame height setting of previous step: In some Lightning contexts, Salesforce ignores this setting and instead dynamically re-sizes the frame according to its content. This causes a conflict because Folderize at the same time tries to re-size its content for the frame height. The result may be a too-short frame or other anomaly. For this reason, the code in step (2) above includes parameter initDelayInMs. This produces a delay (here 300 milliseconds) in loading the Visualforce content into the frame. The delay forces Salesforce to use your height setting, because it briefly doesn’t have content to measure. Depending on your environment, the delay may need to be increased for this trick to work. On the other hand, if your frame loads satisfactorily, you could reduce the delay.
9. Give users access to the new Visualforce page. To do this by profile, click Security from Setup | Visualforce Pages. Or grant users access to the page in a custom permission set.
If you are just setting up object-record view for the first time, return to Folders for Object-Records and complete the steps there.
Configure Button or Link
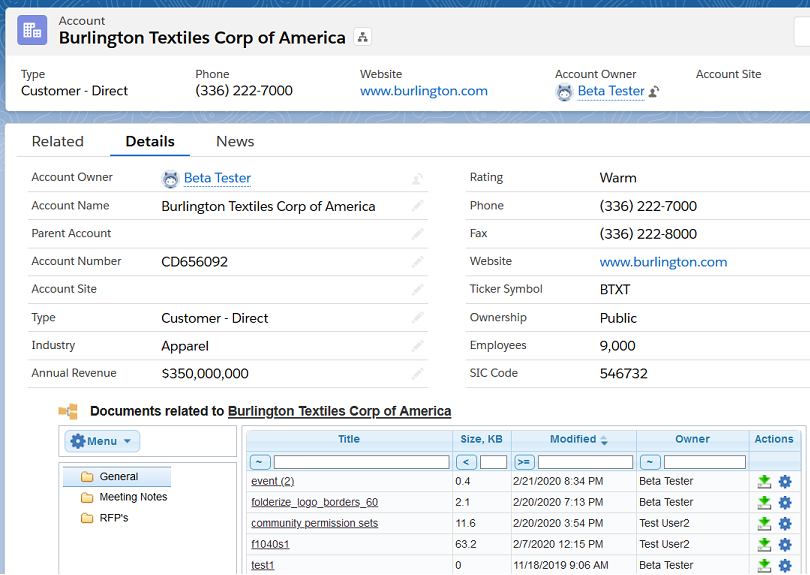
The component you configure in this section will open a record-related Folderize full-page view.
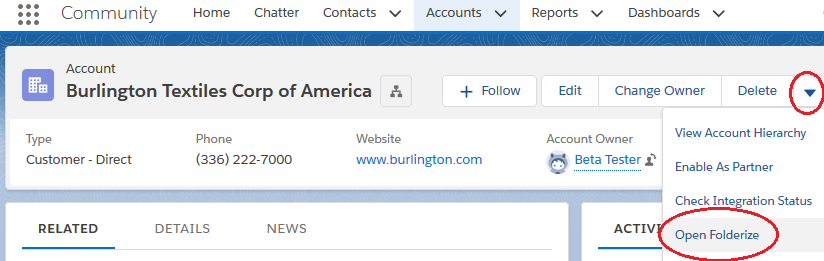
For Accounts and Opportunities, a pre-defined button called Open Folderize is part of the package. You may use this and/or customize a button in next step.
To create a button or link for any object:
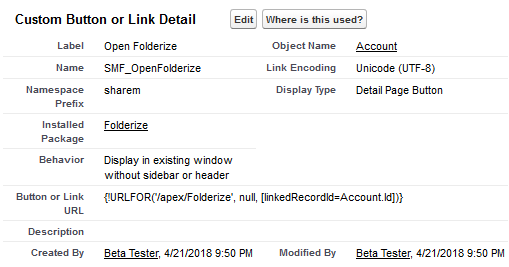
1. Go to Setup | Object Manager | [object] | Buttons, Links, and Actions | New Button or Link (that is the Lightning sequence, or use classic equivalent). Then copy these properties:
- Content Source: URL
- Display Type: Detail Page Button or Link, as preferred
- Button URL: copy block below, substituting object API name for “Account”. (See notes above about API names.)
{!URLFOR('/apex/sharem__Folderize', null, [linkedRecordId=Account.Id, initDelayInMs=300])}- Link Encoding (at bottom of edit page): Unicode (UTF-8)
- Behavior: Select either:
- Display in existing window without sidebar or header. Note that in Lightning a link will not obey this setting, but will open new window anyway, so the following choice is preferred for link.
- Display in new window. If you select this, then after saving, select Window Open Properties and set Height (600 pixels recommended); Resizeable; Show Scrollbars.
2. Add to object layout. Notes:
- After you first create the button or link, it may not appear immediately in your layout setup available selection. If that is the case, log out/in and look for it again.
- For the Classic user interface, drag button from available Buttons into section Custom Buttons.
- For Lightning and Mobile, drag button from available Mobile and Lightning Actions into section Salesforce Mobile and Lightning Experience Actions.
- Drag links from the Custom Links list into the Custom Links section.
- If you have multiple layouts in use, remember to add the buttons/links to all that are relevant.
- To control access by record type: include or exclude the button/link on different layouts, then assign layouts based on user profiles.
- If you are just setting up object-record view for the first time, return to Folders for Object-Records and complete the steps there.
3. Note about parameter initDelayInMs in the code of step (1): In some contexts (such as Lightning Communities) Salesforce tries to dynamically re-size the new container for Folderize, while at the same time Folderize tries to re-size itself for the container height. That causes a conflict that could result in a too-short container, or other anomaly. To solve this, initDelayInMs produces a delay (set here to 300 milliseconds) in loading the content. The delay forces Salesforce to abandon its dynamic resizing, because it briefly doesn’t have content to measure. Depending on your environment, the delay may need to be increased for this trick to work. On the other hand, if the new Folderize view loads satisfactorily, you could reduce the delay.
Button For Mobile View
A separate button is needed for the mobile interface, if desired. For Accounts, a pre-defined button Open Folderize Mobile is part of the AppExchange package. Or create another button as in previous section, except in URL make an additional substitution of FolderizeMobile instead of Folderize, and omit the initDelayInMs parameter. Example:
{!URLFOR('/apex/sharem__FolderizeMobile', null, [linkedRecordId=Account.Id])}